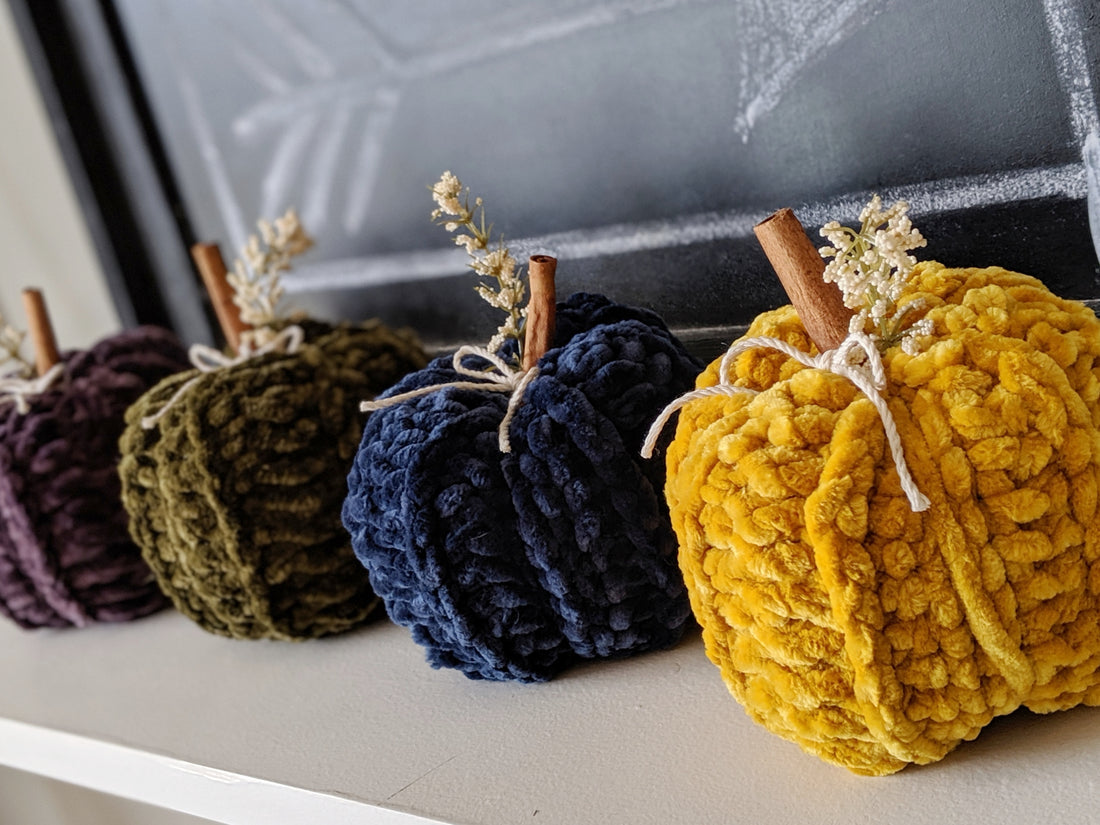
Hello Fello Fall Lovers! Fall is right around the corner and it just so happens to be my favorite season so I'm so excited! The colors changing and the warm cozy feel the season has just makes me so happy. So to celebrate how about a free pumpkin pattern for these easy to make Velvet Crochet Pumpkins.

As a little girl velvet dresses were my worst enemy. I hated the feel of that dry velvet! I remember one that I had was green with elastic at the wrist and wearing those itchy white tights. Yikes the things stick with you over the years.
This post contains affiliate links, so we may earn a small commission when you make a purchase through links on our site at no additional cost to you.
The Jonesy Co. LLC is a participant in the Amazon Services LLC Associates Program, an affiliate advertising program and may receive a small commission if you make a purchase.
Oh my velvet this time around is amazing, thank goodness! Bonus it is so nice to crochet with! Have you tried it? I was at Hobby Lobby yesterday and picked up some of their beautiful velvety smooth yarn. The colors are so rich and vibrant I can't get enough! I want to make all the things in velvet now! First though let's start with Velvet Crochet Pumpkins!

Pin for Later!
Notes About the Pattern
--I would suggest using the Chainless Foundation it is so much easier to sew the two edges together with a Chainless Foundation rather than a chain row.
-- You will be working in rows
-- CH 1 at the beginning of each row doesn't count as a stitch
--Throughout this pattern you will be working in the middle bar of the HDC. (It is located in the front of the stitch and just under the top "v" that you normally work your HDC into. (HDCF)
Stitches/Techniques
CH - CHAIN
FHDC - FOUNDATION HALF DOUBLE CROCHET (Tutorial By Chiwei at www.1dogwolf.com HERE)
HDCF - HALF DOUBLE CROCHET FRONT BAR (Tutorial by Sarah Lora from Ball Hank n' Skein HERE
SL ST - SLIP STITCH
ST - STITCH
Materials

YARN – #5 BULKY WEIGHT VELVET YARN - I USED HOBBY LOBBY YARN BEE VELVETY SMOOTH YARN
HOOK– 6.00 MM J-
POLY-FIL OR OTHER TYPE OF STUFFING
CINNAMON STICK AND FLOWER AND ROPE (WHATEVER YOU WOULD LIKE TO USE FOR YOUR STEM AND DECORATION)
Let's Begin!
ROW 1
Slip Knot, FHDC 15, CH 1 Turn (15 FHDC)
ROW 2 - ROW 15
HDCF in each ST across, CH 1, Turn (15 HDCF)
You will need to fold work your in half and line up the FHDC row with the last row you completed. Work a SL ST in each of the stitches across, this will seam the ends together. Fasten off leaving a 3' long tail.

Creating a Pumpkin
**Don't worry about right or wrong sides, they look the same so it doesn't matter for this design.**.
Using your tapestry need sew around the bottom of the pumpkin with your long tail and pull tight to close it in a tight circle.
Stuff your pumpkin, I used about 3 handfuls of polyfil

Using your tapestry need sew around the top of the pumpkin with your tail and pull tight to close it in a tight circle.
Using your long tail (or another piece of yarn) even wrap around the pumpkin.
To create the bulbous look of the pumpkin use the 3 ft. long tail to wrap around the pumpkin and take the tapestry needle through the center of the pumpkin and pull tight. I begin where I made the seam to create the pumpkin and then wrap the around the pumpkin evenly for a total of 4 bulbs. Secure all ends and weave in any extra strands of yarn remaining.


I used a cinnamon stick, faux flowers, and rope to finish off the top of the pumpkin. Cutting cinnamon sticks can be difficult as they tend to break apart randomly I would recommend purchasing some that are already cut short approximately 3.5", these are the cinnamon sticks I use. You can use hot glue to secure your stem and other decor pieces to the pumpkin.

Please share your finished pumpkins on Instagram using the #thejonesyco!!
I can't wait to see how you decorate with your pumpkins!!
Happy Hookin' - Sarah